A personalised notebook is the perfect gift, promotional item or space for thoughts and doodles.
Find out how to design your own notebook covers with 4 design tools…
- Doxzoo Cover Design Tool
- Microsoft Word
- Canva
- Design Software e.g. Adobe or GIMP

Design notebook covers using the Cover Design Tool
Choose a notebook style, finalise your spec and choose the ‘Design a cover’ option to access the Doxzoo Cover Design Tool.
The tool offers a range of basic options, including background colours, text, shapes and images. It is designed for entry level users.
- Choose a notebook style and click ‘Order Now’
- Click on section 4 ‘Configure cover’ to personalised your cover
- Select the ‘Design a cover’ option for the front and back cover in order to access the Cover Design Tool
- Use the background option to change the background colour

- Use the text, image and shape options to create your design
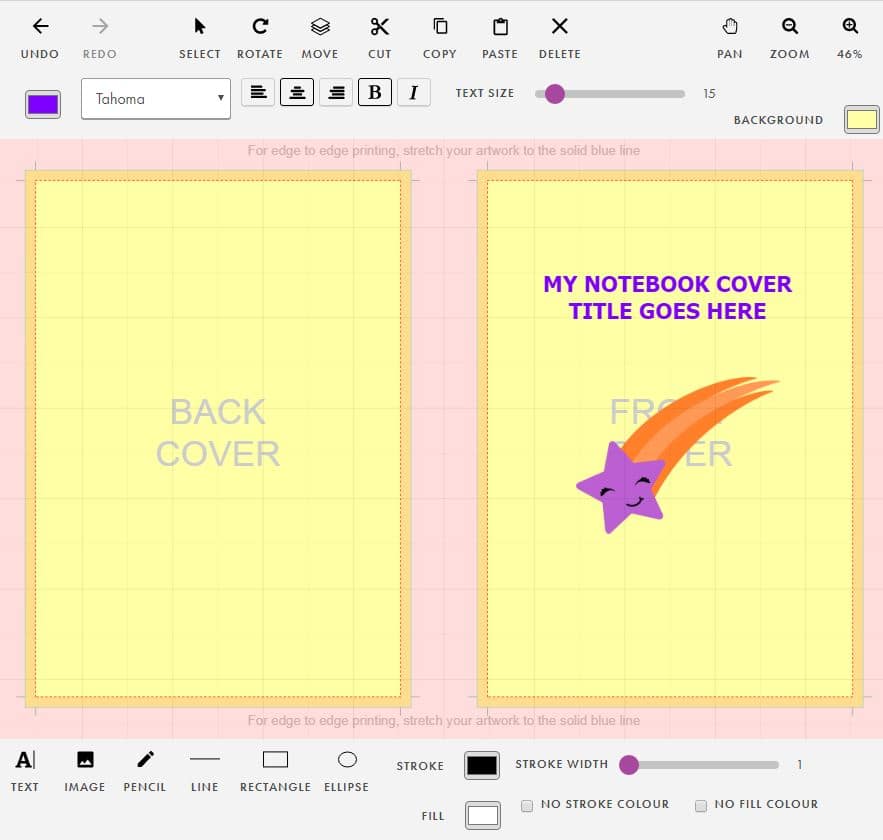
- When complete, click ‘Save & continue’ to proceed with your order
Design notebook covers using Microsoft Word

Microsoft Word is a widely used word processing software. It is ideal for an entry level user and has a range of basic design options, including the ability to add background colours or images, pictures/photos/logos, text, headings and more.
When your cover design is complete, it can be easily exported as a PDF.
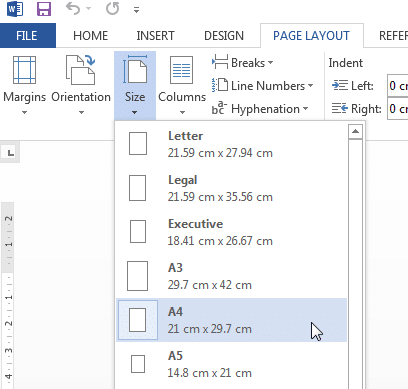
- Launch Microsoft Word and select ‘Page Layout’ > ‘Size’ to configure the page size (e.g. A4 or A5). We also recommend adding 6mm of bleed to each edge of the page. For A4 notebook covers, the dimensions should be 222 mm (w) x 309 mm (h). For A5 notebook covers, the dimensions should be 160 mm (w) x 222 mm (h).
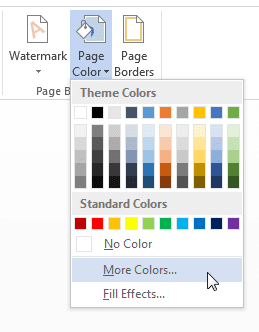
- Select ‘Design’ > ‘Page Color’ to change the background colour. Choose from the available colours or click ‘More Colours’ > ‘Custom’ to add your own using the RGB colour model.
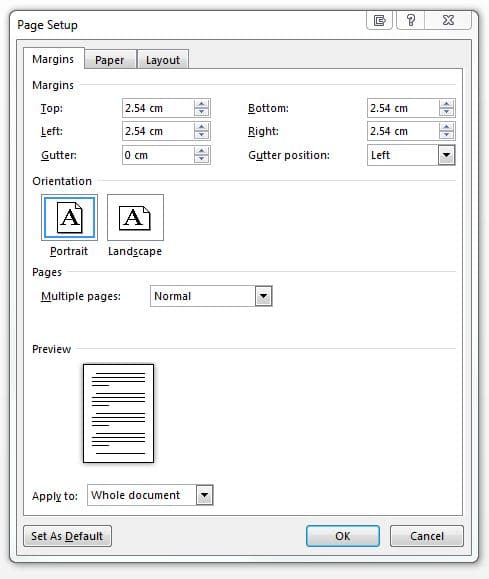
- Select ‘Page Layout’ > ‘Margins’ > ‘Custom Margins’ to set the margin to 5mm (0.5cm) or above
- Select ‘Insert’ > ‘ Pictures’ to add pictures, photos or logos etc. to your notebook cover.

- Select ‘Insert’ > ‘Text Box’ to add text or ‘WordArt’ for a choice of pre-styled headings.

- When your cover design is complete, select ‘File’ > ‘Export – Create PDF’ to export the cover as a PDF
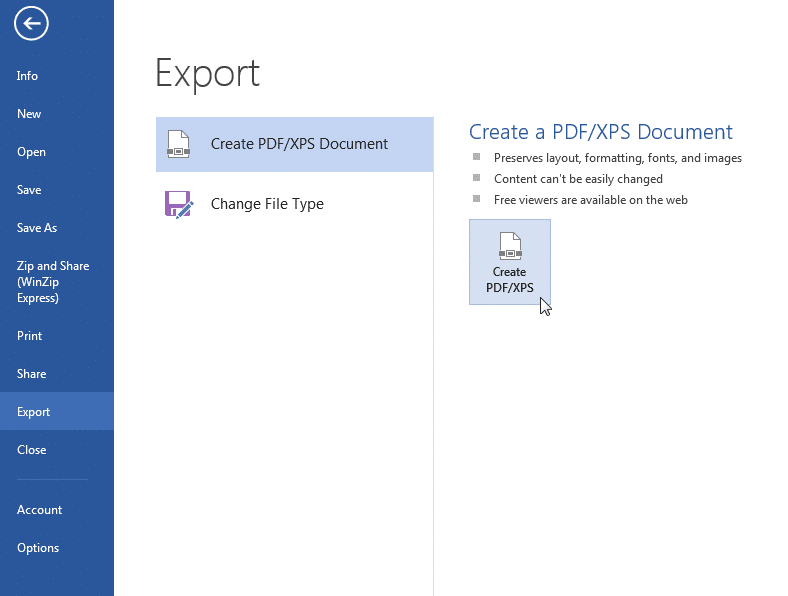
- Repeat this process twice – once for the front cover and once for the back cover. This will result in two separate PDF files.
Design notebook covers using Canva

Canva.com is a simple online design tool, perfect for creating simple yet professional notebook covers.
- Go to Canva.com and log in or sign up for a free account
- Add custom dimensions to match the required cover size. We recommend adding 6mm of bleed to each edge of the page. For A4 notebook covers, the dimensions should be 222 mm (w) x 309 mm (h). For A5 notebook covers, the dimensions should be 160 mm (w) x 222 mm (h).

- Use the Canva tools to create your covers – start by adding a background colour, pattern or image using the ‘Bkground’ icon
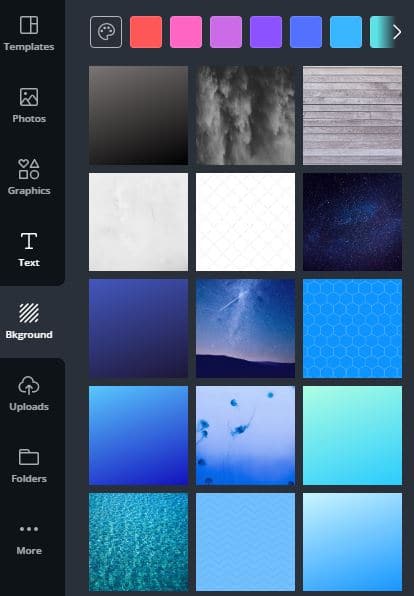
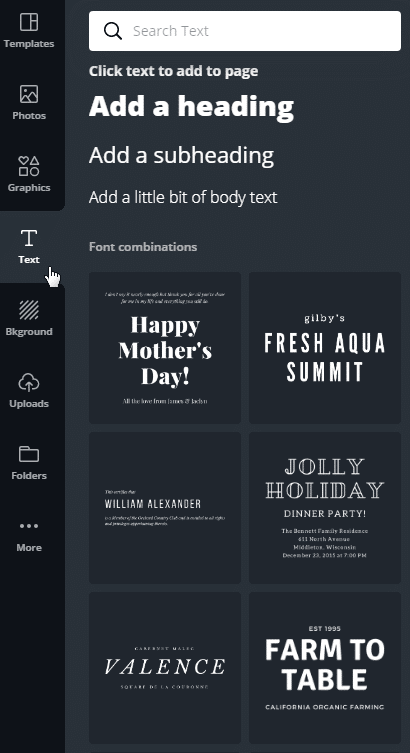
- Use the other tools e.g. ‘Photos’, ‘Graphics’ and ‘Text’ to personalise your design. You can also upload your own images e.g. logo using the ‘Uploads’ option.
-
-
- When the front cover is complete, add a new page using the ‘Add a new page option’ and create your back cover. Alternatively, click the duplicate option to copy the front cover. You can then edit it accordingly.
-

-
-
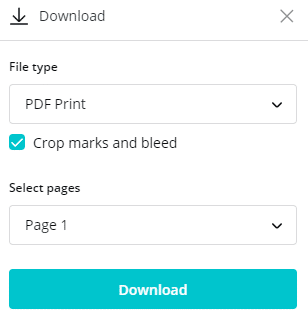
- When complete, click ‘Publish’ > ‘Download’ > ‘File type: PDF Print’ > Tick ‘Crop marks and bleed’ > ‘Download’. Please download the front cover and back cover as two separate PDFs.
-
Design notebook covers using design software – e.g. Adobe or GIMP
Design software such as Adobe Photoshop, Ilustrator and InDesign are suitable for intermediate and advanced users.
Free alternatives are also available, such as GIMP.
These tools allow you a greater deal of creative freedom, with the ability to create high quality graphics, use layers, add filters and more.
-
-
- Set-up your page dimensions to match the desired notebook size. We also recommend adding 6mm of bleed to each edge of the page. For A4 notebook covers, the dimensions should be 222 mm (w) x 309 mm (h). For A5 notebook covers, the dimensions should be 160 mm (w) x 222 mm (h).
- Design your notebook cover using the options available
- Add crop marks and export to PDF
- When the front cover is complete, repeat these steps for the back cover. Save these as 2 separate PDFs.
-
You’ve designed your notebook covers – what next?
If you’ve used the Doxzoo Cover Design Tool, it’s simple. Finish your design and proceed to checkout to place your order.
If you’ve used Microsoft Word, Canva or Design Software to create your notebook covers, follow these steps to place your order:
-
-
- When you’re ready to order, select a notebook style (wire bound notebooks are the most popular)
- Click the green ‘Order now’ button at the top of the page
- Finalise your spec (under ‘Document settings’) and proceed to section ‘4. Cover’
- Click the blue ‘Configure cover’ button
- Work through the steps and choose the ‘Upload a cover design’ option for the front and back cover.
- Upload your front cover file, ensuring it meets the stated dimensions
- Upload your back cover file, ensuring it meets the stated dimensions
- Check that the cover layout is as expected and adjust as necessary
- Return to the document preview and proceed to checkout
-
Happy printing!
Questions? Check out our Help Center or send us a message via Live Chat.
Related articles
7 personalised notebook cover ideas
Looking for a reliable printing company?
Get an instant quote